
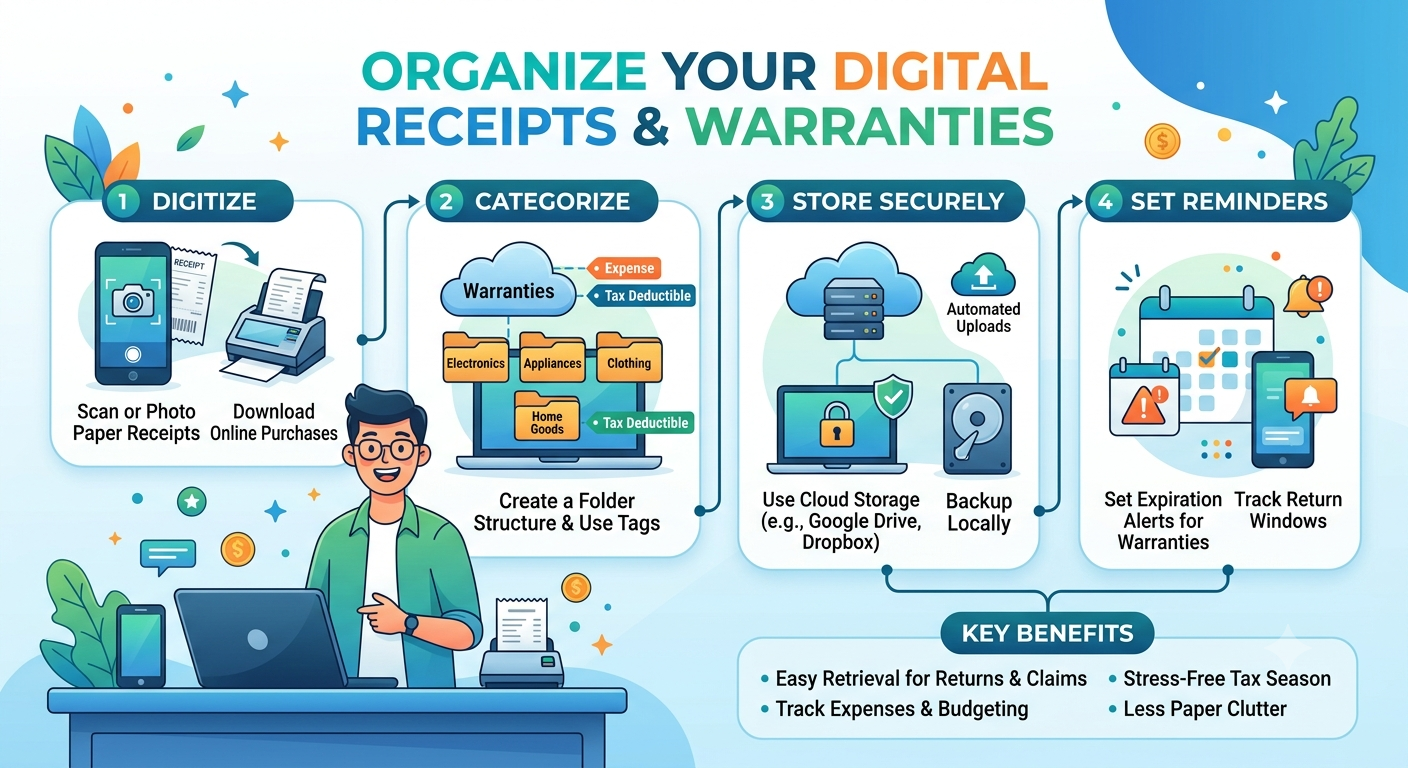
A Effective method
I used to work on my freelancer projects and was really wondering how to organize digital receipts that are generated.
I thought other people might also be facing the same problem. So, I rolled up my t-shirt sleeves and got back to work to see what can be done.
And that the solution I have found I am sharing with you.
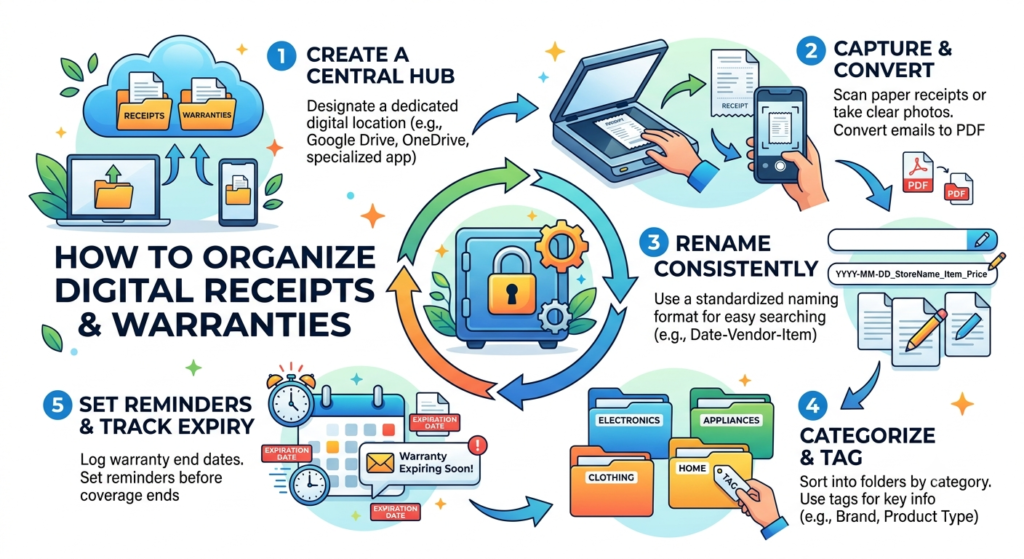
The most effective way to organize digital receipts and warranties is to create one central archive, give every important purchase a unique record, and connect its receipt, warranty, repair history, and deadlines to that record.
I strongly use cloud storage for documents, a spreadsheet for tracking, and calendar reminders for actions.
This approach does not require a paid app. It can work for a household, a freelancer, or a small business, and it can be expanded as the number of purchases grows.
1. Choose one central archive
Start with one primary storage service: Google Drive, Microsoft OneDrive, iCloud Drive, or Dropbox. Choose a service you already use, can access from your phone and computer, and can back up reliably.
Create a main folder named Purchase Records. Inside it, create the following structure:
Purchase Records/
├── 01 - Products and Warranties/
├── 02 - Everyday Receipts/
├── 03 - Repairs and Claims/
├── 04 - Business and Tax/
└── 05 - Sold or Disposed Items/
Use the folders for distinct purposes:
- Products and Warranties: Receipts, warranty certificates, manuals, serial numbers, and purchase details for products you still own.
- Everyday Receipts: Low-value purchases that do not need individual product records.
- Repairs and Claims: Service invoices, claim references, repair reports, and correspondence.
- Business and Tax: Business expenses, tax invoices, and other records subject to accounting or retention requirements.
- Sold or Disposed Items: Records for products you no longer own but may need for resale disputes, insurance, or historical reference.
For expensive or warrantied products, create a separate folder for each product. For ordinary purchases, organize files by year instead of creating hundreds of unnecessary folders.
The goal is to have one reliable location for documents, not several overlapping filing systems.
2. Use a consistent file-naming system
A file is only useful if you can find it when you need it. Avoid names such as IMG_5021.jpg, receipt-final.pdf, or scan003.pdf.
Use this format:
YYYY-MM-DD_Product_Retailer_Document-Type.pdf
For example:
2026-03-12_Laptop_ABCStore_Receipt.pdf
2026-03-12_Laptop_Manufacturer_Warranty.pdf
2026-03-12_Laptop_Serial-Number.jpg
2026-06-18_Laptop_Service-Centre_Repair-Invoice.pdf
I like this approach and will recommend you to use it.
Use the actual purchase date, product name, retailer, and document type. If a field is unknown, omit it rather than guessing.
This naming convention offers three benefits:
- Files sort chronologically because the date starts with the year, month, and day.
- Searching for a product or retailer is straightforward.
- Receipts, warranties, and repair records remain distinguishable even when they relate to the same purchase.
I use to keep Keep filenames reasonably short. Avoid putting full addresses, complete payment-card numbers, or other sensitive information in filenames.
3. Create one master purchase register
Folders preserve documents, but they do not automatically tell you which warranties are expiring or which purchases are still eligible for return. A master spreadsheet fills that gap.
Create a Google Sheet or Excel workbook called Purchase Register. Use one row per important product.
Include these columns:
| Field | Purpose |
|---|---|
| Record ID | A unique identifier for the purchase |
| Product | Common product name |
| Brand and model | Identifies the exact product |
| Purchase date | Establishes the purchase timeline |
| Retailer | Identifies the seller |
| Purchase price | Useful for returns, claims, and resale |
| Serial number | Helps identify the exact unit |
| Return deadline | The actual final date under the applicable policy |
| Warranty expiry | The documented warranty end date |
| Receipt link | Link to the saved receipt |
| Warranty link | Link to the warranty terms or certificate |
| Status | Active, return pending, repair pending, expired, or disposed |
For example:
| Record ID | Product | Purchase date | Return deadline | Warranty expiry | Status |
|---|---|---|---|---|---|
| PR-001 | Laptop | 12 Mar 2026 | 26 Mar 2026 | 11 Mar 2028 | Active |
| PR-002 | Washing machine | 5 Apr 2026 | 12 Apr 2026 | 4 Apr 2028 | Active |
These dates are illustrative. Actual return rights, warranty periods, and expiry calculations depend on the seller’s terms, the manufacturer’s documentation, and applicable law.
The important rule is to record the deadline from the actual source document rather than calculating it from a generic assumption. Some warranties start on delivery or installation, and some products have separate coverage periods for parts, labor, or specific components.
Use spreadsheet links to connect each record to its documents. If a product has several service visits, link to its product folder or repair-history sheet rather than trying to fit every document into one cell.
4. Capture documents immediately after purchase
The best filing system is one that prevents documents from becoming scattered in the first place.
For each important purchase:
- Download the original invoice or receipt from the retailer’s website or order page.
- Save the order confirmation and warranty terms if they contain information not included in the invoice.
- Photograph or scan paper receipts before they fade or get lost.
- Record the model and serial number from the product label or device settings.
- Save the documents in the correct product folder.
- Rename the files consistently.
- Add the purchase to your register and record its return and warranty deadlines.
For everyday low-value purchases, save the receipt if it is relevant to a return, reimbursement, tax obligation, or other likely need. Not every small purchase requires a dedicated product folder.
For paper receipts, make sure the entire document is readable, including the retailer’s name, transaction date, item description, and total. Keep the original image if you also create an OCR-processed version.
OCR, or optical character recognition, converts text in an image into searchable text. It can make scanned invoices easier to search, but it can misread dates, product codes, and amounts. Check important fields manually.
5. Keep a complete record for each warrantied product
For electronics, appliances, tools, furniture, and other expensive purchases, create one folder per product.
For example:
01 - Products and Warranties/
└── PR-001_Laptop/
    ├── 01_Receipt.pdf
    ├── 02_Warranty-Terms.pdf
    ├── 03_Serial-Number.jpg
    ├── 04_Manual.pdf
    ├── 05_Installation-Record.pdf
    └── 06_Repair-History/
Save only the records that apply to the product. An installation record may be essential for an appliance, while a manual may be unnecessary for a simple household item.
Keep these details together:
- Original proof of purchase.
- Warranty certificate or full warranty terms.
- Product model and serial number.
- Delivery or installation date, where relevant.
- Manufacturer or authorized service contact.
- Repair invoices and service reports.
- Claim reference numbers and written correspondence.
This is more useful than keeping a receipt alone. A warranty claim may require proof of purchase, identification of the product, and compliance with specific claim procedures.
Never assume that a receipt guarantees coverage for every fault. Read the warranty terms, including exclusions, required maintenance, and whether parts and labor are covered.
6. Track return windows and warranty expiry with reminders
A receipt archive should not merely store information. It should help you act before a deadline passes.
Use a calendar such as Google Calendar or Outlook. Create separate reminders for returns, warranty reviews, and warranty expiry.
| Reminder | When to set it | What to do |
|---|---|---|
| Return deadline | Several days before the actual deadline | Test the product and resolve any return issues |
| Warranty review | 30 days before expiry | Check defects and review unresolved service requests |
| Warranty expiry | On the documented expiry date | Confirm the coverage period has ended, subject to applicable terms |
| Repair follow-up | On the date promised by the service centre | Follow up on the claim or repair |
For an expensive product, create an earlier reminder if replacement parts or authorized repairs may take time.
I also suggest to Name reminders clearly. For example:
Check laptop warranty — PR-001
Include the link to the relevant spreadsheet record in the reminder description. That way, when the alert appears, you can immediately open the product details and supporting documents.
Do not assume every product has a 30-day return window or a two-year warranty. Check the actual seller policy, invoice, warranty terms, and applicable consumer rights. A manufacturer’s warranty may also differ from the retailer’s return policy.
7. Make receipts searchable from your e-mail
Many receipts never make it into a folder because they remain buried in an inbox. Solve this by using email as an intake channel, not as the permanent archive.
Create an email label or folder called Purchase Records. Use your email provider’s filters, where available, to identify messages containing terms such as:
- Receipt
- Invoice
- Order confirmation
- Tax invoice
- Warranty
- Payment confirmation
- Service request
Review the matching messages before applying automatic rules. Not every message containing the word “invoice” is a purchase receipt, and some legitimate receipts use different wording.
For an important purchase, download the original invoice and attachments to the central archive. Retain the email if it contains order numbers, delivery details, or instructions that are not present in the saved files.
Use a consistent approach across multiple email accounts. If you have personal, work, and family purchase accounts, review each one rather than assuming every receipt arrives in the same inbox.
A simple monthly search for recent purchases can help identify documents that were missed.
8. Protect your archive and select your second back up
Digital organization is incomplete if a lost account, accidental deletion, or corrupted device can remove every copy of a receipt.
Follow these safeguards:
- Enable multifactor authentication on your cloud-storage account.
- Use a strong, unique password.
- Limit sharing permissions for purchase and tax records.
- Keep a second copy of important files in a separate location.
- Periodically test that your backup files open correctly.
- Review account recovery options and make sure you can regain access.
For example, you might keep the primary archive in Google Drive and an encrypted backup on an external drive. Do not rely on a second folder in the same account as your only backup, since account access problems or deletions may affect both.
Receipts and warranties can contain personal information, addresses, order identifiers, and payment details. Share only the documents required for a claim. Avoid public links and remove unnecessary sensitive information before sharing a document, while preserving the original unaltered record privately.
Google Drive’s official guidance explains how to organize files using meaningful names, folders, and descriptions. See Google Drive: Organize your files .
9. Decide what to keep and what to be removed
Keeping everything forever may seem safe, but it can make an archive harder to manage. Use a retention policy based on the purpose of each document.
| Document type | Practical retention approach |
|---|---|
| Product receipt | Keep while you own the product and while it may support returns, warranty claims, insurance, or resale |
| Warranty certificate | Keep for the full coverage period and until any pending claim is resolved |
| Repair invoice | Keep with the product’s service history |
| Business expense receipt | Follow applicable tax and accounting retention rules |
| Insurance-related purchase record | Follow the relevant policy and claim requirements |
| Routine low-value receipt | Remove when no longer needed, subject to any legal or reimbursement requirements |
Do not use one universal retention period for all records. Tax requirements vary by jurisdiction and situation. In India, for example, businesses may need to retain records under the applicable tax and accounting rules; check the requirements that apply to your circumstances.
For guidance on protecting personal records and deciding what to retain, see the U.S. Federal Trade Commission’s document-retention guidance . Its suggested periods are U.S.-specific and should not be treated as Indian legal requirements.
Before deleting a record, ask: Could I still need this to establish ownership, support a claim, prove an expense, resolve a dispute, or sell the product? If the answer is yes or uncertain, retain it until the relevant obligation has ended.
10. Use a 10 min monthly maintenance schedule
A system that requires constant attention is unlikely to last. Schedule one short monthly review.
Minute 1–3: Collect. Search your email and downloads for new receipts, invoices, and warranty documents.
Minute 4–6: File. Save the documents, rename them, and place them in the appropriate folders.
Minute 7–8: Update. Add important purchases to the spreadsheet and verify return and warranty dates.
Minute 9: Review. Check reminders due in the next 30–60 days and follow up on unresolved repairs or claims.
Minute 10: Back up. Confirm that the latest documents are included in your second copy.
If you have years of unorganized records, do not attempt to sort every purchase before starting. Begin with expensive products you still own, active warranties, open repairs, and business records that must be retained. Organize older routine receipts afterward if they are still useful.
The system becomes effective as soon as your most important records are searchable, even if the archive is not yet perfect.
11. Set up the system in 60 min
If you are starting from scratch, use this sequence instead of trying to organize every document at once.
- Minutes 0–10: Create the archive. Set up the main folders and choose one cloud-storage service.
- Minutes 10–20: Create the spreadsheet. Add the product, purchase date, return deadline, warranty expiry, status, and document-link columns.
- Minutes 20–35: Collect important records. Search your email for recent appliance, electronics, furniture, and other high-value purchases.
- Minutes 35–45: Create product folders. Save receipts, warranty documents, serial-number photos, and repair records together.
- Minutes 45–55: Add reminders. Record actual return deadlines and warranty expiry dates, then schedule advance notifications.
- Minutes 55–60: Test retrieval. Pick a product at random and see whether you can locate its receipt and warranty quickly.
If a record is missing, mark it as missing in the spreadsheet and try to retrieve it from the retailer, manufacturer, or original email. Do not invent an expiry date or assume a product is covered simply because you remember purchasing it.
12. The unique improvement and the purchase id
The most useful improvement is to assign every important purchase a unique ID, such as PR-001, PR-002, and PR-003.
Use that same ID in the product folder, spreadsheet, and calendar reminders.
For example:
- Spreadsheet:
PR-001 — Laptop - Folder:
PR-001_Laptop - Receipt:
PR-001_2026-03-12_Receipt.pdf - Warranty:
PR-001_Manufacturer-Warranty.pdf - Calendar:
PR-001 — Check warranty claim
Why does this help? Product names and retailer names can be similar. You might own two phones from the same manufacturer, or buy the same appliance model for different properties. A unique ID removes ambiguity and keeps the documents connected.
For products that need servicing, add a simple repair log:
| Date | Event | Reference |
|---|---|---|
| 18 Jun 2026 | Service request opened | SR-1042 |
| 21 Jun 2026 | Technician visit | Repair invoice link |
| 24 Jun 2026 | Follow-up required | Calendar reminder |
This provides a useful history if a fault recurs or a claim requires evidence of earlier repairs.
The ID is not a replacement for the original invoice or warranty certificate. It is an organizational reference that connects those documents.
13. How to know whether the system is working
Test the archive using three realistic questions:
- Can you find the original receipt for your most expensive household purchase in under a minute?
- Can you identify which important products have warranties expiring within the next 60 days?
- Can you open the original invoice, warranty terms, and repair history for a product without searching several email accounts?
If you can answer all three questions using your archive, spreadsheet, and calendar, the system is doing its job.
You do not need to purchase special software unless you need features such as automatic receipt extraction, barcode scanning, household sharing, or built-in warranty alerts. Start with the simplest system you will maintain consistently.
REFERENCES
These resources provide additional guidance on file organization, warranty records, and secure document retention.
1. Google Drive Help — Organize your files Official instructions for folder structures, meaningful filenames, descriptions, and file organization.
2. Federal Trade Commission — Warranties Explains written warranties and important warranty terms. Check the laws and warranty rules that apply in your country.
3. Federal Trade Commission — Protecting your personal information: Which documents to keep and which to shred Guidance on retaining important records and protecting sensitive information. Retention recommendations are jurisdiction-specific.
4. Microsoft Support — OneDrive Official documentation for cloud file storage, organization, and recovery.
5. Sixbytes — How to Organize Receipts and Warranty Documents Digitally A practical guide to file naming, product records, reminders, and backups.
6. Sixbytes — How to Organize Digital Warranties and Product Manuals Further suggestions for connecting product manuals, purchase proof, and warranty records.
7. Livdock — How to Organize Digital Receipts, Invoices, and Warranties Discusses folder structures, product-linked records, and routine maintenance.
Bottom line: Store the original documents in one archive, connect important purchases using a unique ID, track deadlines in a spreadsheet and calendar, and keep a tested backup. That is a complete, low-cost system for finding receipts and warranties when you actually need them.
Other reads:
A useful youtube video:
A pinterest pin:

Linkedin -- www.linkedin.com/in/shishir-bhargava-68a8b4257
- How to Organize Digital Receipts and Warranties | A Practical System That Works - October 11, 2026
- How to Live Without AI | 30-Day Experiment Taught Me to Think Again - October 8, 2026
- 2026 Lexus IS 350 F Sport: Shocking review - August 22, 2026
⚠️ Most People Discover Trends When It's Too Late
Join the Trends Goldmine Insider List and get emerging AI tools, future products, viral keywords, and hidden opportunities before they hit the mainstream.
While everyone else is chasing yesterday's trends, you'll be spotting tomorrow's opportunities first.
🚀 Free Weekly Trend Alerts • No Spam • Unsubscribe Anytime
SIGN UP NOW & RECEIVE A SHORT REPORT ON HOW TO MAKE FORTUNE WITH TRENDS.Trusted by readers who want to discover opportunities before the crowd.