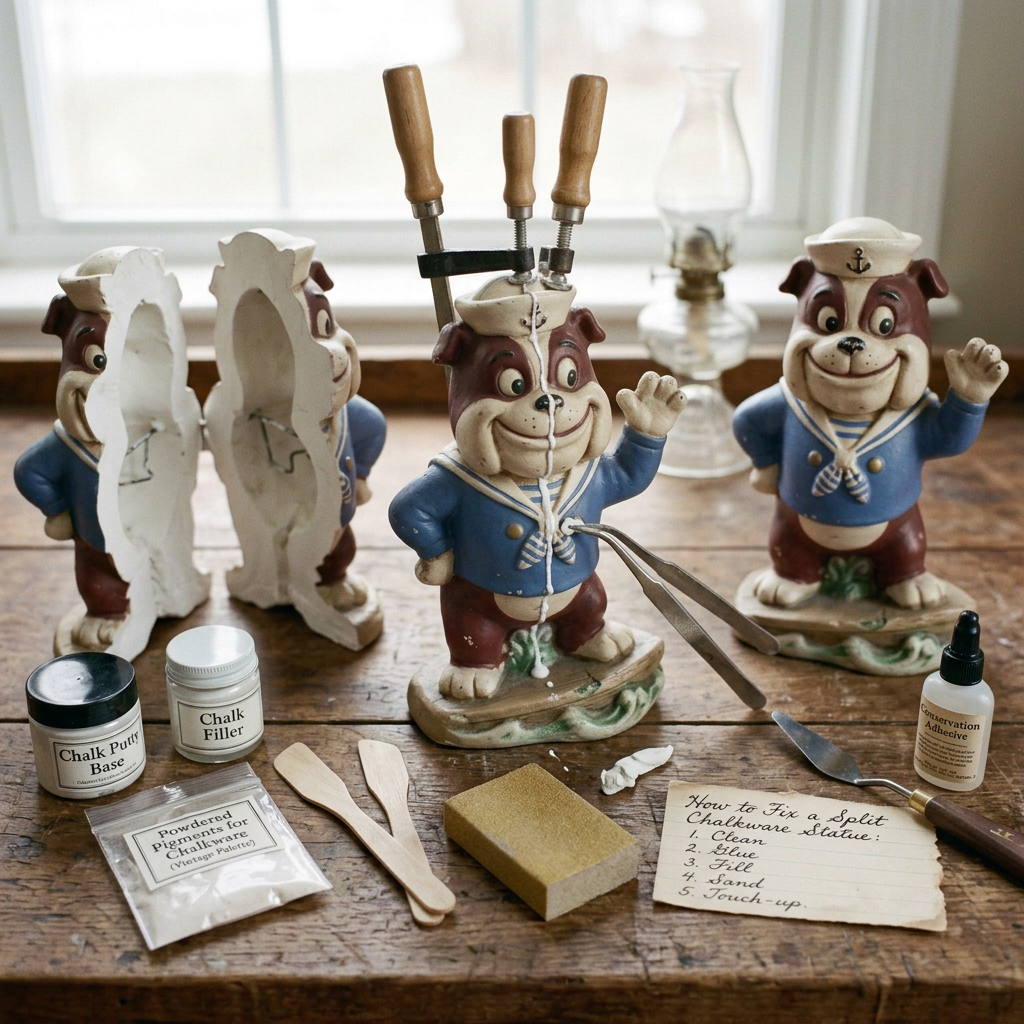
How to Fix a Split Chalkware Statue
A split chalkware statue can often be repaired at home if the break is clean, the pieces are available, and the material is still firm. The key is to remove loose dust, test the fit, choose a suitable adhesive, and support the statue while the repair cures. However, antique, valuable, heavily cracked, or crumbling chalkware requires extra care because moisture, excessive pressure, and unsuitable glue can cause permanent damage.
This guide explains how to fix a split chalkware statue using practical, step-by-step methods. It also covers broken figurines, missing pieces, cleaning, base and wall repairs, damaged handles, and common questions about using glue or water.
What Is Chalkware?
Chalkware is a decorative object traditionally made from plaster of Paris or a similar gypsum-based material. It has been used to create figurines, animal ornaments, religious statues, seasonal decorations, and other decorative pieces. Many chalkware objects are painted with matte or lightly textured finishes.
Unlike fired ceramic, chalkware is generally porous and relatively soft. It can chip, crack, absorb moisture, and lose paint when handled roughly. A statue may look solid from the outside while having weak areas around its neck, arms, base, or other narrow sections.
Before repairing a statue, determine whether it is genuinely chalkware, painted plaster, resin, ceramic, or another material. Different materials require different repair methods.
Can Chalkware Be Repaired?
Yes, chalkware can often be repaired, especially when the break is clean and all the original pieces are available. A small split, detached arm, broken base, or separated decorative element may be repairable with a compatible adhesive and careful support.
The repair becomes more difficult when the material is crumbling, the statue has shattered into many fragments, paint is flaking, or a large section is missing. Repairs to valuable antiques can also affect their historical value.
A simple repair may restore the statue’s appearance, but it does not necessarily restore its original strength. Avoid using a repaired statue for handling, lifting, or hanging unless the repair has been assessed as structurally sound.
Tools and Materials Needed
Gather the following supplies before beginning:
- A soft-bristled artist’s brush for removing loose dust.
- A clean, padded work surface or shallow tray.
- A suitable adhesive compatible with porous plaster and the statue’s finish.
- Wooden supports, foam blocks, or a padded container to hold the pieces in position.
- Cotton swabs for careful cleanup, if appropriate for the adhesive.
- A small spatula and compatible conservation-grade filler for minor gaps, if needed.
- Artist’s acrylic paints and a suitable matte finish for cosmetic touch-ups.
- Nitrile gloves and eye protection when required by the product instructions.
For an ordinary decorative statue with a clean break, a plaster-compatible PVA adhesive may be appropriate. A two-part epoxy may be considered for some repairs requiring greater strength, but it can be difficult to reverse and may age differently from the original material. Always check compatibility before applying any adhesive.
Avoid choosing glue solely because it dries quickly. A strong adhesive can still be unsuitable if it stains the chalkware, runs into the porous material, or makes future conservation difficult.
How to Fix a Split Chalkware Statue Step by Step
Step 1: Inspect the Damage
Place the statue on a padded surface and examine the split under good lighting. Determine whether the damage is a clean break, a hairline crack, a loose fragment, or a larger structural failure.
Look for powdery material, flaking paint, missing chips, old glue, and cracks extending beyond the main split. Photograph the damage before starting, particularly if the statue is old or collectible.
If the material sheds powder when touched, or the split passes through a thin neck, narrow ankle, projecting arm, or other weight-bearing area, stop and consider professional conservation.
Step 2: Collect and Arrange the Pieces
Collect any detached fragments and keep them in a padded container. Arrange the pieces beside the statue and identify where each fragment belongs.
Do a dry fit before applying glue. The pieces should meet naturally without forcing, grinding, or twisting them. Check that the statue’s face, body, decorative details, and base line up correctly.
If the parts do not fit, do not force them together. There may be missing fragments, old adhesive, or internal damage that needs specialist attention.
Step 3: Remove Loose Dust
Use a soft, dry brush to remove loose dust from the broken edges and surrounding surface. Brush gently so that the powder does not become embedded in the material.
Do not scrub the edges with sandpaper or scrape away sound chalkware to create a better fit. Removing original material can enlarge the break and make the joint weaker.
If old glue is present, avoid cutting or dissolving it without first identifying the material. Some adhesives are difficult to remove safely and may have penetrated the porous surface.
Step 4: Choose the Right Adhesive
Select an adhesive designed for the materials involved. For a small, clean break in ordinary painted chalkware, a compatible PVA adhesive may be suitable. Follow the manufacturer’s directions for application, working time, and curing.
For a valuable antique, an object with fragile paint, or a complicated structural break, consult a conservator before choosing an adhesive. Professional treatments may use materials selected for their ageing properties, compatibility, and potential reversibility.
Use only a small, controlled amount of adhesive. Excess glue can spread across the painted surface, leave shiny marks, or create a visible ridge along the joint.
Step 5: Join the Broken Sections
Apply the adhesive according to its instructions. Bring the broken surfaces together gently and align the edges accurately.
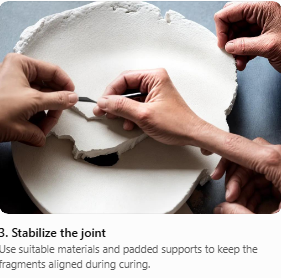
Hold the pieces in position without squeezing so hard that the chalkware crumbles. Use padded supports to keep the statue stable while the adhesive sets. Avoid putting tape directly on delicate paint, because removing it may lift the finish.
Wipe away excess adhesive only with a method approved for that product and safe for the statue’s surface. Do not use water or solvents automatically; either could damage the paint or plaster.
Step 6: Allow the Repair to Cure
Keep the statue supported and undisturbed for the full curing period stated on the adhesive packaging. Initial setting does not necessarily mean the bond has reached full strength.
Do not lift the statue by the repaired area, test the joint repeatedly, or remove its supports prematurely. Larger breaks may need more elaborate support than a small detached ornament.
Step 7: Fill Small Gaps if Necessary
Once the adhesive has cured, inspect the joint. If a minor gap remains, consider a compatible, stable filler suitable for plaster and the existing finish.
Apply the filler sparingly with a small tool. Build up a missing edge gradually rather than covering a large area with a thick layer. Allow the filler to dry or cure according to its instructions.
Do not fill a moving crack before stabilizing the underlying break. Filler is primarily for small losses and cosmetic gaps; it should not be relied on to hold a structurally unstable statue together.
Step 8: Touch Up the Paint
If the repaired area is stable, use a small brush to apply compatible paint in thin layers. Match the original colour and finish as closely as possible.
Test the colour on a separate surface before applying it to the statue. A matte finish may be more appropriate than a glossy one, but the correct choice depends on the original object.
Avoid repainting the entire statue unnecessarily. Preserving original paint and surface details is usually preferable to making the object look completely new.
How to Fix a Split Chalkware Statue With Glue
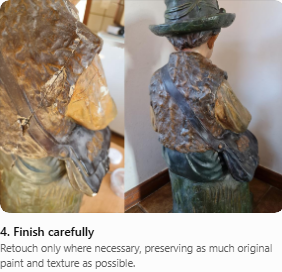
Glue can be useful for joining chalkware when the pieces fit cleanly and the surrounding material remains sound.
- Dry-brush the broken edges to remove loose dust.
- Test the fit without glue and establish the correct alignment.
- Apply a small amount of compatible adhesive as directed by the manufacturer.
- Join the pieces gently, keeping the original contours aligned.
- Support the statue so gravity does not pull the sections apart.
- Allow the adhesive to cure fully before handling or considering any cosmetic work.
The most important factor is compatibility, not simply adhesive strength. Avoid flooding the joint with superglue or using hot glue as a substitute for a properly selected repair adhesive. Both can create problems with appearance, penetration, or long-term stability.
How to Repair Chalkware Statues With Larger Cracks
A larger crack needs more investigation than a simple surface split. First, check whether the crack is stable or whether the two sides move independently. A crack that widens when the statue is gently repositioned may indicate structural weakness.
For a stable, narrow crack in an ordinary decorative object, a suitable filler or adhesive treatment may be enough. If the crack extends through the body, crosses a load-bearing area, or continues to open, the statue may require reinforcement or specialist treatment.
Do not drill punches or insert metal pins into a fragile chalkware statue as a routine DIY step. Drilling can create additional fractures and remove original material. Structural reinforcement should be planned by someone experienced with plaster objects.
How to Repair Broken Chalkware When Pieces Are Missing
If part of the statue is missing, first stabilize any existing breaks. Keep loose fragments and do not discard small chips; even tiny pieces may help restore the original shape.
A small, non-structural loss can sometimes be filled with a compatible conservation filler or a suitable modelling compound. Shape the fill gradually, using photographs or an undamaged matching area as a guide.
Allow the filler to cure completely before attempting colour matching. Large missing sections, detailed faces, hands, fingers, or other distinctive features are difficult to reconstruct convincingly. For collectible or sentimental pieces, professional restoration may provide a better result.
How to Repair Chalkware Figurines
Chalkware figurines often have delicate features, including fingers, ears, tails, hats, wings, and narrow necks. These parts are especially vulnerable to accidental knocks.
Work on one broken section at a time. Use a padded tray to prevent fragments from moving, and support the figurine in a position that does not place weight on fragile projections.
If an arm or other small part has detached cleanly, dry-fit it before applying adhesive. If a feature has shattered, or the break affects the figurine’s main support, do not rely on a small dab of glue alone.
For painted figurines, protect the original finish. Excess sanding, aggressive cleaning, and heavy repainting can erase fine details and reduce collectible value.
How to Clean Chalkware Statues Before Repair
Cleaning chalkware requires care because unfinished plaster is porous and can absorb water and dissolved dirt. Water can produce tide marks, staining, and damage to fragile finishes.
For most dusty statues, begin with a soft, dry brush. Direct loose dust away from the surface and collect it without pressing a vacuum nozzle against the object.
Avoid soaking, rinsing, steam cleaning, household cleaners, abrasive sponges, and vigorous scrubbing. If the statue has a durable, intact coating, limited damp cleaning may sometimes be possible after testing an inconspicuous area. If colour transfers to the test swab, stop.
Do not attempt to remove every stain. Some marks may be embedded in the material, and aggressive cleaning can cause more damage than leaving them in place.
If the statue is valuable, has flaking paint, shows signs of mould, or has unknown coatings, consult a conservator before cleaning.
How to Fix a Split Chalkware Statue After Cleaning
If the statue was already cleaned before the split was noticed, allow it to dry naturally in a stable indoor environment before attempting a repair. Do not use a hair dryer, heater, direct sunlight, or another source of intense heat to speed up drying.
Inspect the split and surrounding surface for darkened plaster, softened material, paint lifting, or new stains. If the chalkware is still damp or feels unusually weak, do not apply adhesive yet.
Once the material is fully dry and stable, remove only loose surface dust and follow the repair steps described earlier. If cleaning caused the split or exposed a crumbling interior, professional assessment is safer than immediately applying glue.
How to Fix a Split Chalkware Statue by Hand
A small, clean break can sometimes be repaired by hand using careful alignment and padded support. Work on a level surface with enough room to position all the fragments before opening the adhesive.
Keep your fingers away from fragile edges, and avoid pinching the broken surfaces together too tightly. Use foam blocks or another padded support to hold the object steady while the adhesive sets.
For larger pieces, use a second person to help position the statue if necessary, without lifting it by a broken section. If the repair cannot be held securely without pressure or awkward handling, stop and arrange a more suitable support system.
How to Fix a Split Chalkware Statue From the Outside
If the split is visible on the exterior, inspect whether it is a surface crack or a break extending through the body.
For a superficial, stable crack, a compatible filler may improve the appearance after the cause of the crack has been addressed. For a through-crack, the broken sections must first be stabilized; filling the outside alone will not create a reliable structural repair.
Avoid applying a thick layer of filler over the entire crack to hide it. This may conceal ongoing movement and produce a noticeable patch. After the repair is stable, use small amounts of compatible filler and carefully matched paint if appropriate.
How to Fix a Split Chalkware Statue From the Bottom
A split at the bottom or base can be particularly serious because the base supports the statue’s weight.
Place the object on a padded, level surface and check whether the base rocks, separates, or has missing fragments. Do not stand the statue upright if the base is unstable.
For a small, clean break in a sound base, a compatible adhesive may be suitable if the pieces fit correctly. Keep the statue supported throughout curing and avoid loading the repaired base until the adhesive has fully cured.
If the base is extensively cracked, the statue is heavy, or the split passes through a narrow support, consult a specialist. A decorative repair should never be assumed to have restored the base’s full load-bearing capacity.
How to Fix a Split Chalkware Statue on a Wall
If a chalkware statue is mounted on a wall, remove it from display only if you can do so safely. Never attempt to glue a broken statue while it is still hanging.
A detached or cracked wall-mounted piece should be supported from underneath before removal. If it is heavy, high up, or attached by an uncertain bracket, seek help rather than pulling it free.
After removal, inspect the mounting points, back surface, and any hanging hardware. Repair the chalkware separately from the wall attachment. Rehang it only after the statue and its mounting system have been assessed as secure.
Do not use ordinary double-sided tape, general-purpose mounting strips, or adhesive alone to support a heavy chalkware object overhead. A mechanical mounting system appropriate to the object’s weight and condition is safer.
How to Fix a Split Chalkware Statue Quickly
The quickest safe repair begins with preparation rather than rushing the adhesive.
- Gather all the pieces before applying glue.
- Dry-fit the broken sections to check alignment.
- Choose a compatible adhesive and read its curing instructions.
- Prepare padded supports in advance.
- Allow the joint to cure fully before handling.
Do not use a hair dryer, excessive heat, or extra adhesive to shorten the curing time. A product that feels dry on the surface may not yet be strong enough to support the statue.
If the statue is valuable, shattered, or structurally unstable, a rushed repair may make later restoration more difficult.
How to Fix a Split Chalkware Statue to Make It Bigger
If you want to make a chalkware statue bigger by adding height, extending a base, or enlarging a feature, this is a reconstruction project rather than a straightforward repair.
First, stabilize any existing cracks. Then determine whether the proposed addition would place extra weight or stress on the original material. A lightweight, compatible extension may be possible for a modern decorative object, but adding plaster directly to a fragile statue can introduce moisture and create weak joints.
Do not simply apply a thick layer of wet plaster to the surface. For an antique or valuable piece, consult a conservator or experienced sculptor before modifying its original dimensions. If the goal is purely decorative, creating a separate extension or replacement component may be safer than altering the original statue.
How to Fix a Split Chalkware Statue With Water
Water is not a suitable general-purpose method for fixing a split chalkware statue. It does not act as an adhesive, and untreated plaster can absorb it rapidly.
Excess moisture can soften or stain the material, carry dirt into the pores, affect old repairs, and damage paint or surface coatings. Therefore, do not soak the statue, pour water into the crack, or use a wet cloth to force the broken sections together.
Some specialist plaster treatments use carefully controlled moisture in specific circumstances, but these are not the same as a simple household repair. For a typical split chalkware statue, dry cleaning and a compatible adhesive are safer starting points.
How to Fix a Split Chalkware Statue With a Broken Handle
A broken handle may be found on a decorative chalkware object, chalk holder, or another plaster ornament. First, check whether the handle is made from chalkware itself or from a different material such as wood or metal.
If the handle is a small, cleanly detached chalkware component, test the fit and use a compatible adhesive following the standard repair procedure. Support the handle so its own weight does not pull on the joint while curing.
If the handle is thin, carries weight, or has broken away with a large section of the body, a simple surface bond may not be strong enough. Do not lift or carry the object by the repaired handle until its strength has been assessed.
Common Mistakes to Avoid When Repairing Chalkware
The following mistakes can turn a manageable repair into a more difficult restoration:
- Using too much glue: Excess adhesive can leave shiny marks, visible ridges, or stains.
- Cleaning with excessive water: Moisture can penetrate porous plaster and damage the finish.
- Forcing the broken edges together: Pressure can crush fragile edges and create additional chips.
- Sanding aggressively: Chalkware can lose its shape and original surface details very quickly.
- Repainting too soon: Paint and filler should be applied only after the repair is stable and fully cured.
- Hanging the statue before testing the repair: A failed joint may cause further breakage or injury.
- Ignoring old repairs: Existing glue or filler may interfere with a new repair and make professional treatment more difficult.
Final Advice
The best way to fix a split chalkware statue is to preserve as much original material as possible, use a compatible adhesive, and allow the repair to cure without movement. Minor breaks in ordinary decorative pieces may be manageable at home, but valuable antiques, fragile paint, crumbling plaster, large missing sections, and unstable bases deserve professional attention.
When in doubt, prioritize stabilization over appearance. A carefully preserved statue with a visible repair is often preferable to an aggressively restored object that has lost its original surface or historical character.
Visual references for the repair process
These images can help readers understand the type of object and the appearance of plaster repairs. Use original photographs of your own repair process in the published article whenever possible; they are more useful to readers and better suited to demonstrating each step.
Additional FAQs: Chalkware Repair and Maintenance
How long does it take to repair a split chalkware statue?
A small break may take only a short time to assemble, but the complete repair depends on the adhesive’s curing period. Some products require several hours, while others need longer. Filling, drying, and paint matching can add additional time. Always follow the product instructions rather than assuming the statue is ready to handle once the glue feels dry.
Can I use superglue on chalkware?
Superglue can bond some materials, but it is not automatically the best choice for chalkware. It can penetrate porous plaster, leave visible residue, and be difficult to remove. It may also create a brittle or conspicuous repair. For a valuable or antique object, consult a conservator about an appropriate adhesive.
Can I use plaster of Paris to repair chalkware?
Plaster of Paris can be useful for certain plaster reconstruction tasks, particularly when rebuilding missing areas. However, applying fresh, wet plaster directly to an old, dry chalkware object can lead to uneven drying, weak fills, and surface damage. It should not be treated as a universal substitute for adhesive when joining two broken pieces.
How do I repair a chalk holder?
A chalk holder may be made of wood, metal, plastic, ceramic, or chalkware. Identify the material before selecting a repair method.
- Wooden chalk holder: A clean split in the wood may be repairable with a suitable wood adhesive, provided the holder is dry and the joint fits correctly.
- Metal chalk holder: The appropriate method depends on the metal and whether the damage is a loose joint, bent component, or fractured part.
- Plastic chalk holder: Use an adhesive specifically compatible with the type of plastic.
- Chalkware chalk holder: Follow the plaster repair method, keeping the repaired section supported until the adhesive has cured.
If the holder is used in a classroom or workshop, check that the repair is secure before putting it back into service.
How to fix a chalk holder with a broken handle?
First, identify whether the handle and holder are made from the same material. Clean the surfaces using a method suitable for that material, check the fit, and select an appropriate adhesive. Support the handle in its correct position while the adhesive cures.
Do not rely on glue alone if the handle carries significant weight or is regularly pulled. A replacement handle may be more practical and safer than repairing a severely damaged one.
How can I prevent chalkware from splitting again?
Prevention begins with careful handling and suitable storage.
- Display the statue on a level, stable shelf away from edges.
- Keep it away from damp rooms, leaking windows, and direct exposure to rain.
- Avoid lifting it by fragile arms, handles, necks, or decorative projections.
- Use padded storage materials when moving or packing it.
- Avoid placing heavy objects against it or stacking other ornaments on top.
- Inspect old repairs periodically without repeatedly flexing or testing the joints.
If the statue has a repaired base or a fragile projecting section, consider a supportive display mount that distributes its weight without placing pressure on the repaired area.
References and further reading
The following sources provide additional guidance on chalkware repair, plaster care, and conservation practices.
1. Canadian Conservation Institute — Care of Objects Made of Plaster of Paris. Guidance on dry cleaning, the risks of moisture, and the complexity of plaster repairs. https://www.canada.ca/en/conservation-institute/services/conservation-preservation-publications/canadian-conservation-institute-notes/care-plaster-paris.html
2. Vaillancourt Folk Art — Repairing Broken Chalkware. Practical information about clean breaks, missing fragments, and the limits of chalkware restoration. https://valfa.com/media-news/chalkware-101/repairing-broken-chalkware/
3. How to Repair Chalkware. A DIY overview of cleaning, joining broken pieces, filling losses, and painting. This is a general repair guide rather than a conservation standard. https://www.htfbw.com/collecting/Antiques/440.shtml
4. Preservation Self-Assessment Program, University of Illinois — Museum Objects. Information on previous repairs, ageing adhesives, and the risks associated with damaged objects. https://psap.library.illinois.edu/collection-id-guide/museumobjects
5. Western Australian Museum — Conservation and Care of Collections. Conservation guidance discussing repair materials, adhesive ageing, and the importance of appropriate treatment methods. https://manual.museum.wa.gov.au/book/export/html/1/
A useful youtube video:
A useful pinterest pin:

Linkedin -- www.linkedin.com/in/shishir-bhargava-68a8b4257
- How to Fix a Split Chalkware Statue: A Complete Repair Guide - October 24, 2026
- Wordle Possible Solution Hints for October 25, 2026 - October 23, 2026
- Star Wars Battlefront 3 Could Be Legendary.. If They Fix this Problems! - October 22, 2026
⚠️ Most People Discover Trends When It's Too Late
Join the Trends Goldmine Insider List and get emerging AI tools, future products, viral keywords, and hidden opportunities before they hit the mainstream.
While everyone else is chasing yesterday's trends, you'll be spotting tomorrow's opportunities first.
🚀 Free Weekly Trend Alerts • No Spam • Unsubscribe Anytime
SIGN UP NOW & RECEIVE A SHORT REPORT ON HOW TO MAKE FORTUNE WITH TRENDS.Trusted by readers who want to discover opportunities before the crowd.